
I recently had to setup a new Windows PC, and I realised that the resources for setting up HQ local video playback were all over the place. I decided to consolidate those resources and write a guide.
Step 1 — Download
Step 2 — Installation
- Install MPC-BE.
- Extract madVR to a fresh madVR folder, and then copy it to the MPC-BE install directory.
Inside the madVR folder right click madHcCtrl.exe and select properties. At the bottom under Security click the Unblock button and then Apply -> Ok.
This will stop the annoying “potentially unsafe software” run window from popping up every time MPC-BE loads madVR. - Install LAV Filters, make sure you un-check all of the components except for what is pictured below.
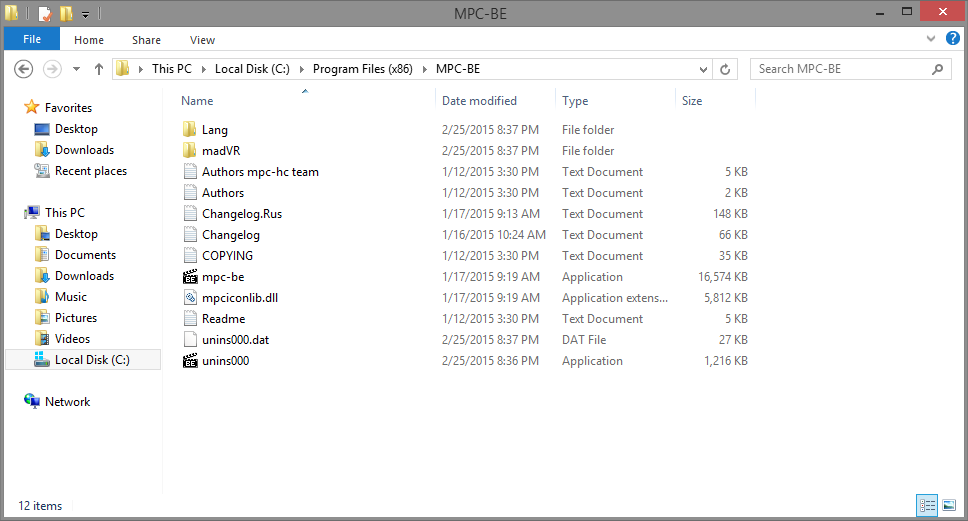
You should now have everything installed with a MPC-BE directory setup that looks something like this.
Next we install madVR. Navigate into the madVR folder and you should spot a install.bat batch file. Right click on it and run it as an administrator.
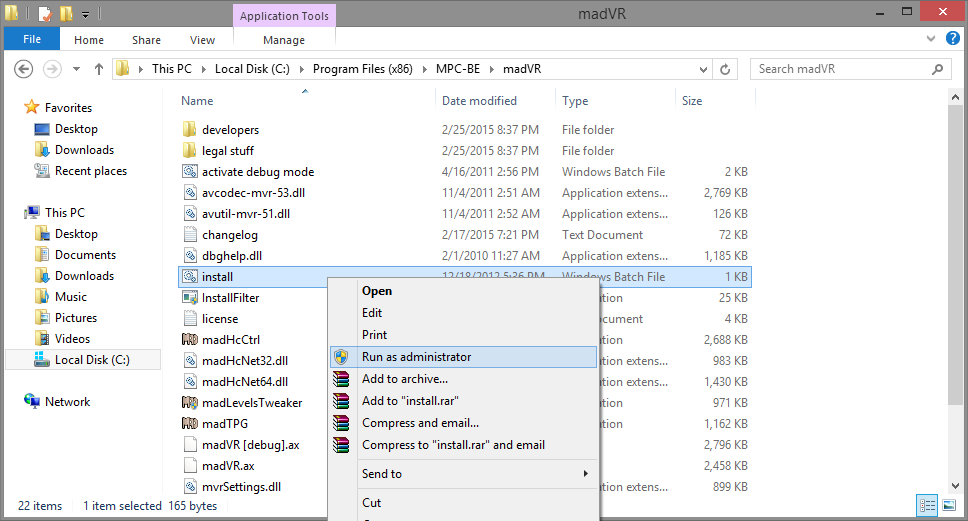
If all goes well you should get a console window with a message saying the filter was registered successfully.
Step 3 — Configuring MPC-BE
Now it is time to configure MPC-BE to use these fabulous new pieces of software. Launch MPC-BE and navigate to View -> Options.
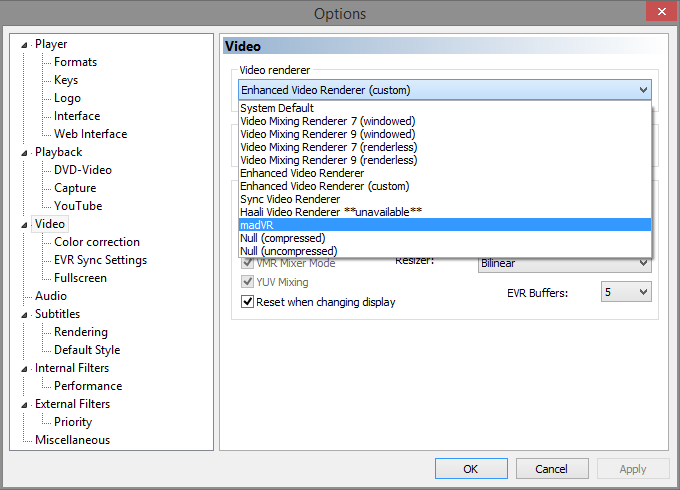
Next navigate to the Video section. You should see a drop down menu option labeled Video renderer and set it to madVR.
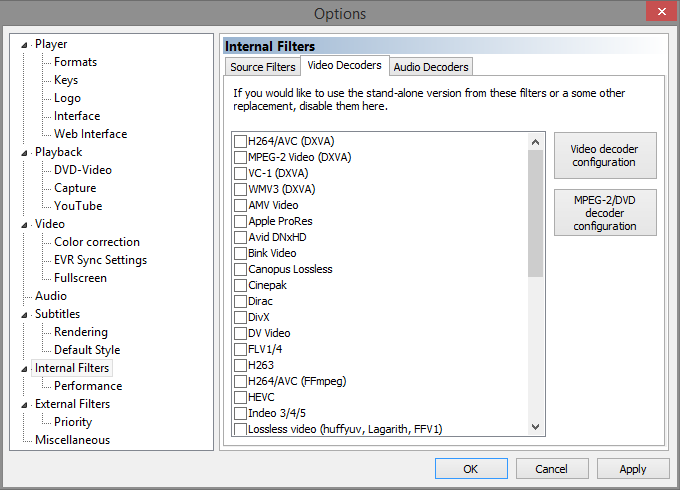
Now navigate to Internal Filters and disable everything for both Video Decoders and Audio Decoders tabs.
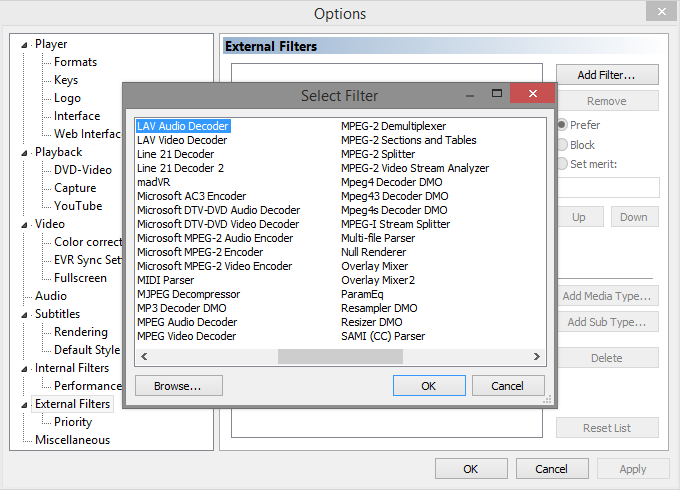
With all of them disabled we will want to add the custom decoders that MPC-BE will use instead. So navigate to External Filters and click the Add Filter… button.
Select LAV Audio Decoder from the list and hit OK.
LAV Audio Decoder should now exist in the External Filters list. Off to the right there are a set of combo box options, make sure you set it to Prefer.
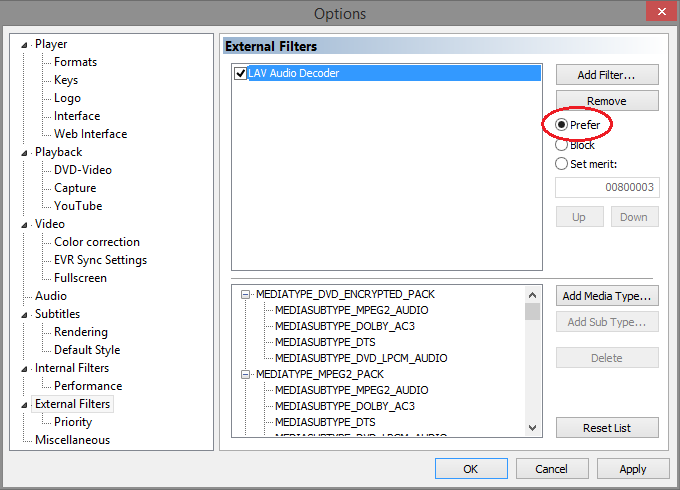
Now follow the last two steps and do the same for LAV Video Decoder and LAV Splitter. Note that _LAV Splitter should appear before _LAV Video Decoder and LAV Audio Decoder
Optional: Navigate to Player -> Interface and enable the option Use the preview in the search (this will enable a thumbnail as you hover over the video timeline).
Step 4 — Configuring LAV Filters
Once you have both of them added to the list double click on LAV Video Decoder within the list. You should be confronted with a window like so.
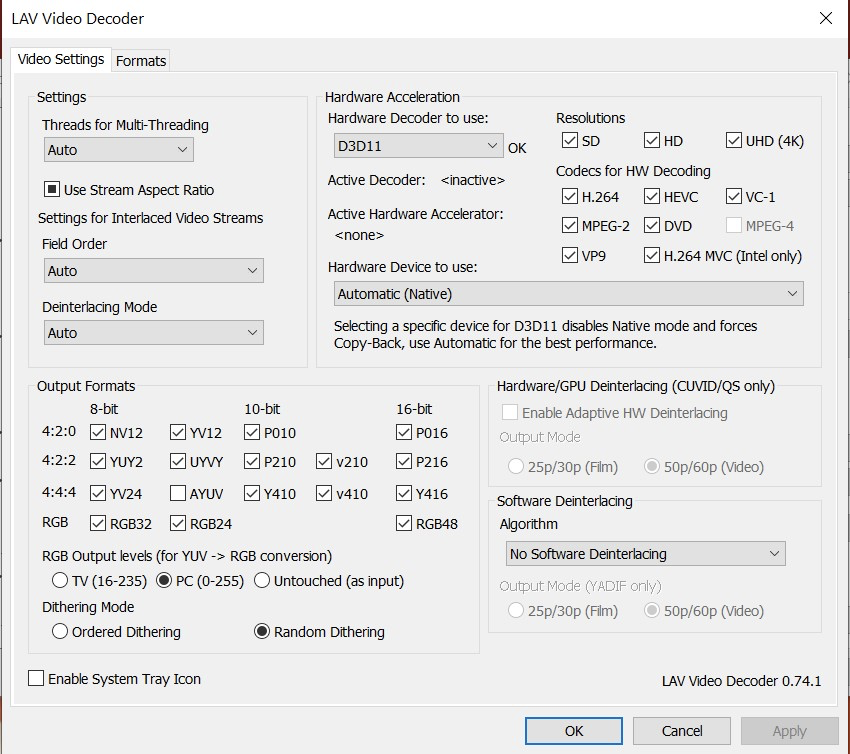
From the drop down menu in the top right, select the appropriate decoder for your GPU. The following guide should help you make the right choice.
None
Stick to high performance software decoding (you need a moderately strong CPU).
NVIDIA CUVID — CUDA decoding
Make sure you configure the Codecs for HW decoding according to the nVidia GPU you have:
- nVidia PureVideo 2 — H.264 and DVD.
- nVidia PureVideo 3 — H.264, VC-1, MPEG-2 and DVD.
- nVidia PureVideo 4 — H.264, VC-1, MPEG-2, DVD and MPEG-4.
- nVidia PureVideo 5 and 6 — H.264, VC-1, MPEG-2, DVD, MPEG-4 and HEVC.
Also enable the UHD (4k) option if you have PureVideo 5 or later GPUs.
Intel QuickSync
For Sandy Bridge, Ivy Bridge, and Haswell CPU’s.
DXVA2 (copy-back)
Recommended for Nvidia GPU’s and ATI/AMD with UVD3.
- CPU with SSE 4.1 support is recommended.
- AMD — Bulldozer or newer.
- Intel — Penryn or newer.
DXVA2 (native)
Recommended for older ATI/AMD GPU’s with UVD 2.x.
D3D11
Recommended for newer graphics cards that support DirectX 11
Step 5 — Configuring madVR
You can access the madVR settings by playing any video and right clicking anywhere in the video player and going to Filters -> madVR Renderer.
From there click Edit Settings.
Rendering -> General Settings
- Disable enable automatic fullscreen exclusive mode.
Scaling Algorithms
- Chroma Upscaling — Jinc, 3 taps, anti-ringing.
- Image Upscaling — Jinc, 3 taps, anti-ringing.
- Image Downscaling — Catmull-Rom, anti-ringing + linear light.
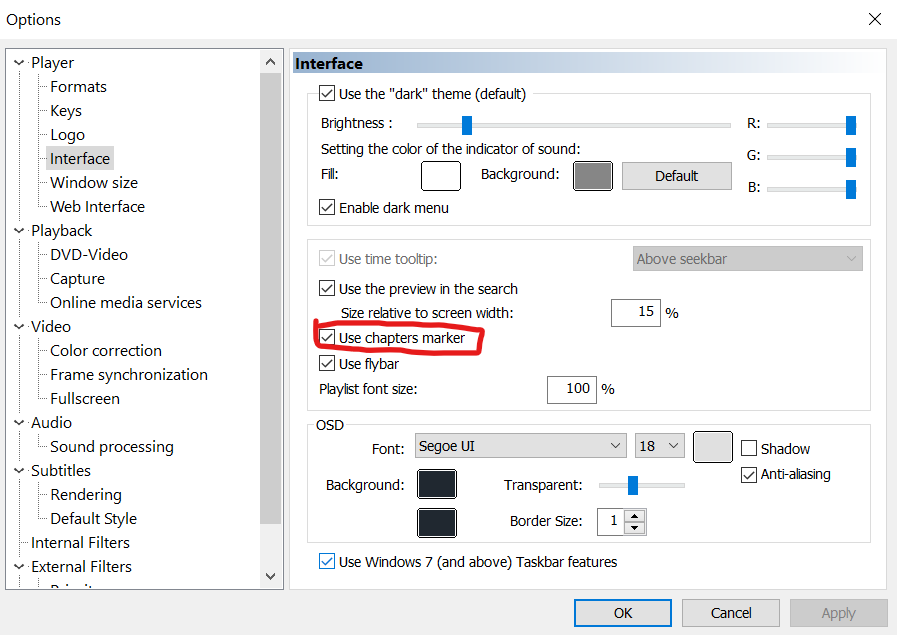
Step 6 — Enabling mkv chapters
To show chapter markers on the tool bar, click options, then click interface, and then tick the box “use chapter marker”.
Step 7 — Better subtitle rendering
For better rendering of subtitles, increase the maximum texture resolution:


